This guide will show you how to connect your iPhone to Windows 11, 10, 8, 7, or MacBook wirelessly or via USB cable.
Table of Contents
Learn how to connect an iPhone to a Windows Laptop via USB cable.
To connect your iPhone to a laptop using a USB cable, you can easily transfer files without an internet connection. This method is useful for transferring large amounts of data or when an internet connection is unavailable.
1. Connect iPhone to Windows Laptop via FoneTool using a USB cable.
FoneTool is a reliable tool for Windows users that allows you to connect your iPhone to a laptop via USB and easily manage your data. It provides features like data backup and transfer, making it a convenient choice for file management on your iPhone.
With FoneTool, you can effortlessly access and transfer photos, videos, songs, contacts, and more from your iPhone to your PC. It organizes your files into collections for easy navigation. You can also transfer files from your PC to your iPhone without erasing any existing data. Additionally, you can transfer files between your iPhone and external storage devices like a hard drive or USB flash drive.
To get started with FoneTool:
- Download and install the FoneTool software on your laptop.
- Launch the application after installation.
- To establish a connection between your iPhone and laptop, simply connect them using a USB cable.
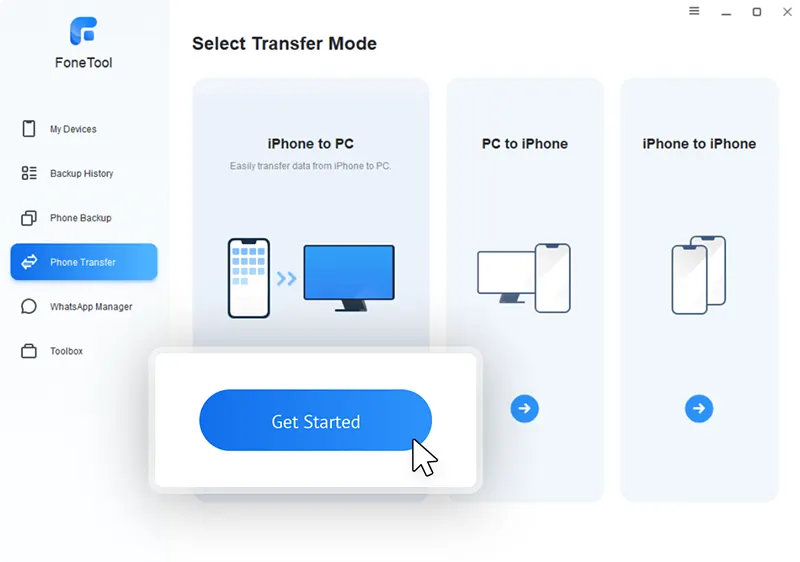
- To access the “iPhone to PC” feature, navigate to the “Phone Transfer” option.”
- By selecting the “Photos” option, you will be able to explore all the albums on your phone. From there, you can choose the specific photos you wish to transfer to your laptop.
- Click on the “Start Transfer” button in the FoneTool interface. Then, choose the desired destination for the transfer and click on the “Transfer” option.
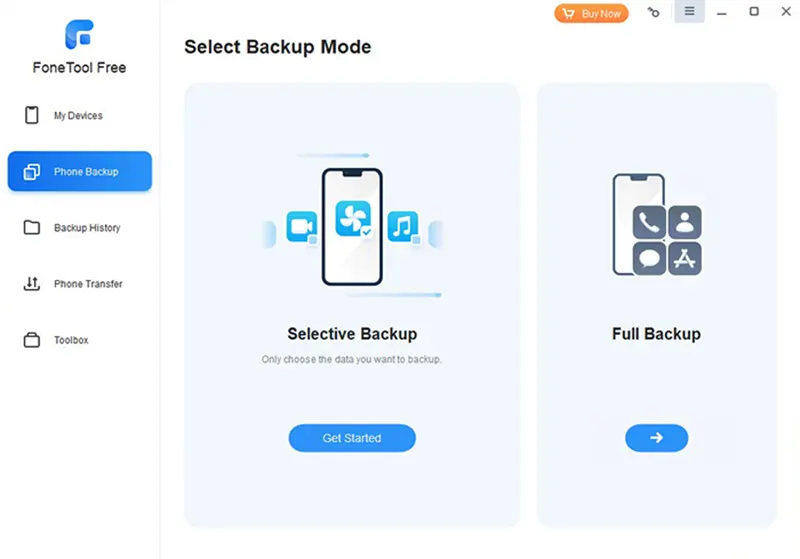
If you wish to create a backup of your iPhone, navigate to the “Phone Backup” section in FoneTool. You will be presented with two options to choose from: “Selective Backup” and “Full Back up.” These options allow you to decide whether you want to back up only specific files or perform a complete backup of all your data.
2. Connect iPhone to Windows Laptop via iTunes using a USB cable.
iTunes, the official iPhone data management tool by Apple, allows you to easily manage your media files. When connected, you can sync music, photos, videos, TV shows, and podcasts to your iPhone. However, it only supports one-way sync, preventing file transfer from iPhone to laptop.
Let’s follow these steps:
- First of all download and install iTunes from Microsoft Store.
- Open iTunes on your laptop.
- To establish a connection between your iPhone and computer, connect your iPhone to your computer using a USB cable.
- Follow the on-screen prompts in iTunes to establish the connection between your iPhone and iTunes.
After establishing the connection between your iPhone and iTunes, follow these steps to add songs to your iPhone:
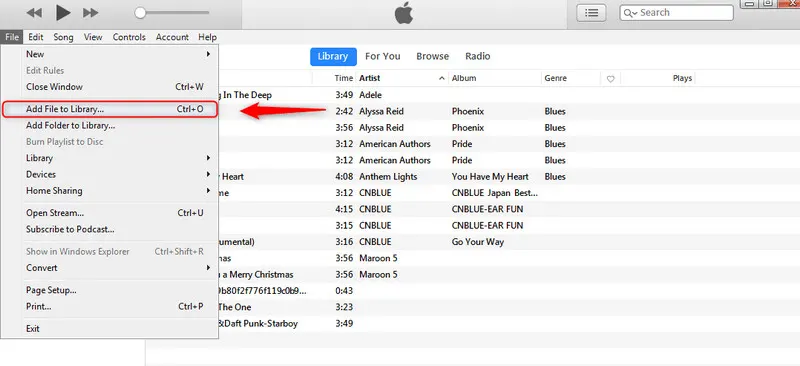
- In the iTunes application, locate and click on the “File” option located in the top menu.
- From the dropdown menu, choose “Add File to Library.”

- Browse and choose the songs you want to add to your iPhone from your computer’s files.
- Click “Open” or “Add” to import the selected songs into your iTunes library.
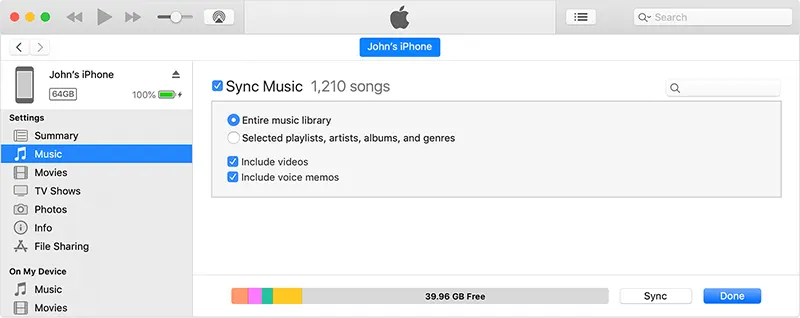
- Once the songs are added to your iTunes library, you can then sync them to your iPhone by selecting the songs and initiating the sync process.

Learn how to connect an iPhone to a Windows Laptop Wirelessly.
To connect your iPhone to a laptop wirelessly, consider these options: Wi-Fi Sync in iTunes, iCloud for data syncing, third-party apps like AirDrop or Dropbox, and iTunes Wi-Fi Sync. These choices enable wireless connectivity, facilitating convenient data transfer and synchronization between your iPhone and laptop without the need for a USB cable.
1. Connect iPhone to Windows Laptop Wirelessly with iTunes.
iTunes allows a wireless connection between your iPhone and laptop. Initially, a USB cable is required for setup, but afterward, when both devices are on the same network, your iPhone will automatically connect to iTunes wirelessly for data syncing.
To connect your iPhone to a laptop wirelessly via iTunes, follow these steps:
- Download iTunes from the Microsoft Store and install it on your laptop.
- Launch iTunes and connect your iPhone to the computer using a USB cable.
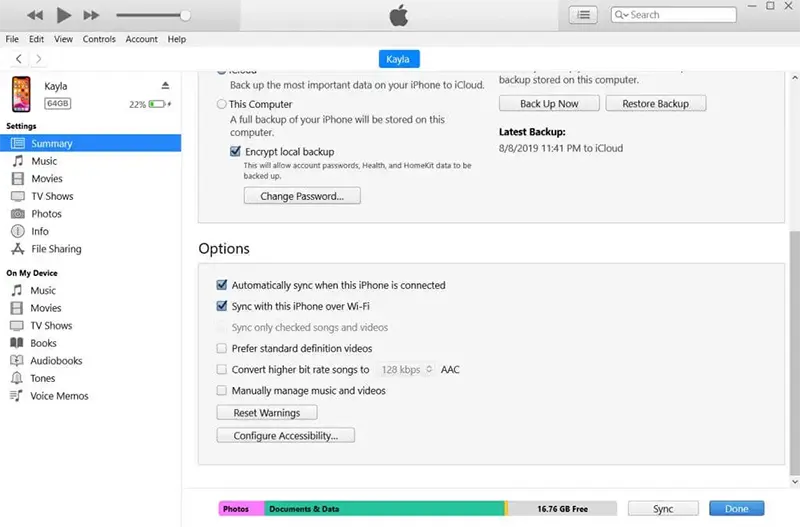
- In iTunes, click on the “Device” tab and navigate to the “Summary” section.
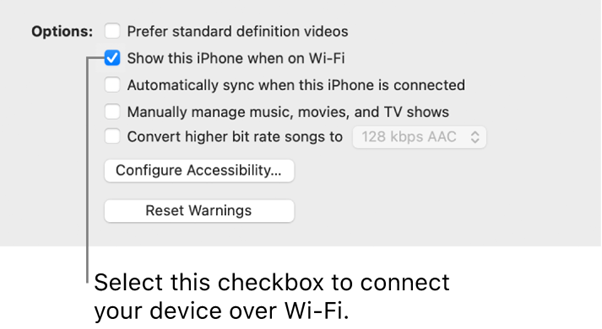
- Under the “Options” section, select “Sync with this iPhone over Wi-Fi”.
- Lastly, click on “Apply” to save the changes.
By following these steps, you can enable wireless syncing between your iPhone and laptop using iTunes. Once the initial setup is complete, you can disconnect the USB cable and continue syncing your iPhone with iTunes over Wi-Fi.
2. Connect iPhone to Windows Laptop Wirelessly with iCloud.
To connect your iPhone to a laptop wirelessly, you can utilize iCloud. Upload files from your iPhone to iCloud and access them easily on your laptop. This is especially useful for accessing iPhone photos on your PC. Keep in mind that iCloud offers only 5 GB of free storage space.
To upload files to iCloud and access them on your laptop:
- Upload files to iCloud
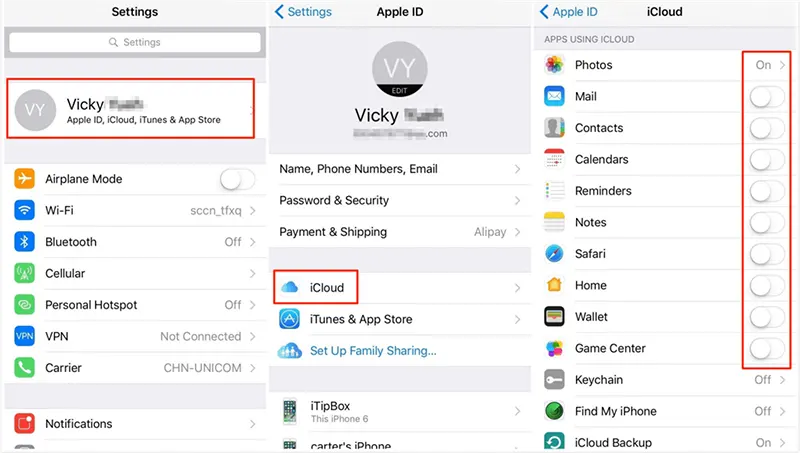
- On your iPhone, go to Settings > [your name] > iCloud and enable iCloud sync.
- Alternatively, in the Photos app, select the photos you want to upload, tap Share, and save them to iCloud Drive.
- Access files on your laptop
- Open a web browser on your laptop and navigate to iCloud.com.
- Sign into your iCloud account using your Apple ID and password.
- You will now see your files on the iCloud website. If needed, you can download them to your laptop for offline access.
In conclusion, there are various methods available to connect your iPhone to a laptop and transfer data. The most common approach is using a USB cable for a direct connection. FoneTool is a helpful tool that enables easy access to photos, videos, contacts, and more on your iPhone. Additionally, when a computer is not accessible, you have the option to connect your iPhone to a laptop via Wi-Fi or Bluetooth, providing wireless connectivity for data transfer. Choose the method that suits your needs and enjoy seamless connectivity between your iPhone and laptop.
How to connect iPhone to Mac?
To connect your iPhone to your Mac and enable Wi-Fi syncing:
- Begin by connecting your device to your Mac using either a USB or USB-C cable. This will establish a physical connection between the two devices, allowing them to communicate.
- Navigate to the Finder on your Mac and locate the device in the sidebar of the Finder window. Select the device from the list to proceed with the setup.

- If you encounter a situation where the device does not appear in the sidebar of the Finder on your Mac, it is recommended to follow troubleshooting steps to resolve the issue.
- In the button bar, locate and click on the “General” option to access the general settings for your device.

- Tick the checkbox that says “Show this [device] when on Wi-Fi” to enable the option of displaying your device when it is connected to the same Wi-Fi network.

- Utilize the button bar to adjust and choose the desired synchronization settings according to your preferences. This allows you to customize the syncing behavior for your device and Mac.
- To save the changes you have made to the sync settings, click on the “Apply” button. This will ensure that your selected preferences for Wi-Fi syncing are applied and saved for future use.


By following these steps, you can connect your device to your Mac and enable Wi-Fi syncing for convenient wireless synchronization.
How to connect iPhone to MacBook Wirelessly?
AirDrop, an Apple software, facilitates secure peer-to-peer WiFi transfer, enabling seamless file and data transfer between Mac, iPhone, iPad, and iPod touch. To utilize AirDrop, ensure your iPhone has iOS 7 or a newer version, while your Mac runs MacOS 10.0 or later. Before connecting your iPhone and MacBook, ensure that AirDrop is activated in the iPhone settings.
To wirelessly connect your iPhone to a Mac using AirDrop, follow these steps:
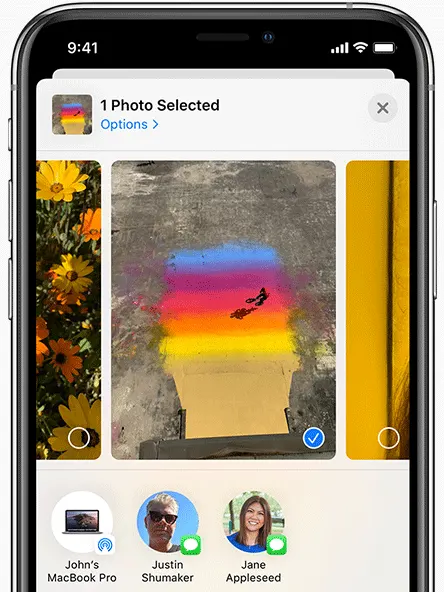
- Access the specific file you wish to share, whether it’s a photo, video, or document.
- Tap on the Share button, usually depicted as an upward-pointing arrow enclosed within a rectangular icon.
- When you open the AirDrop sharing menu, you’ll find a list of nearby devices that have AirDrop enabled. Simply choose the name of the device or person you want to share the file with.
- Once you’ve selected the desired device or person to share the file with, a notification request will be sent to their device. They will then have the option to accept or decline the file transfer. To proceed with the transfer, they should click on “Accept” when prompted.
These ending words are specially for you:
Before purchasing a high-priced device like the iPhone 13 Pro Max or 14 Pro Max, it is essential to carefully consider your financial priorities, assess your budget, and think about the long-term economic impact. Ensure that buying the iPhone 14 Pro and the latest versions aligns with your financial goals and won’t strain your finances unnecessarily.
If the latest iPhone versions are beyond your budget, there are alternative options available that offer excellent features and performance. You can explore iPhone replicas like:
The Cheapest iPhone 14 Pro Max
iPhone 14 Pro Max Turkish replica
of different versions, which may provide a similar experience at a more affordable price. These clone iPhones are worth considering and might appeal to you.